Step One: Gather Your Ingredients
Round up these necessary items and you’re ready to get started. Most of these items you probably have laying around the house.· Styrofoam (bowls, plates or cups will do)
· Acetone (nail polish remover) or Gasoline
· Matches
· Plastic Bottle
· Scissors or Knife
· Plastic Gloves
Step Two: Get Your Base Ready
 The
bottom portion of a plastic bottle will work well as a base for
creating survival fire putty. However, it is important to note that this
is not a good long-term storage solution for the putty or the
ingredients that are used to make it. Simply cut the bottom portion off
of your bottle and you’ll be ready to move on to the next step.
The
bottom portion of a plastic bottle will work well as a base for
creating survival fire putty. However, it is important to note that this
is not a good long-term storage solution for the putty or the
ingredients that are used to make it. Simply cut the bottom portion off
of your bottle and you’ll be ready to move on to the next step.Step Three: Pour Your Acetone in the Base
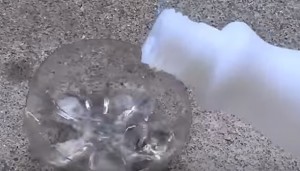
Grab the bottle of nail polish removal and fill up the bottom of the bottle about a third of the way, as shown in the image below and the nearby video. If you prefer, you can use gasoline instead.Step Four: Add the Styrofoam
You can rip up Styrofoam plates or cups and add them into the acetone or gasoline. Keep in mind that it must be pure Styrofoam in order for this survival fire putty trick to work. In other words, if the item you rip up does not work, that means you need to select a different Styrofoam item to rip up.Step Five: Form the Styrofoam
It will be necessary to put several pieces of torn up Styrofoam into the bottom of the bottle, and you may need to put a bit more acetone or gasoline on top of it. You need to push the Styrofoam down to make it all fit and to shape it. You can use a pencil or a twig to help you accomplish this part of the process. The yellow in the image came from the pencil.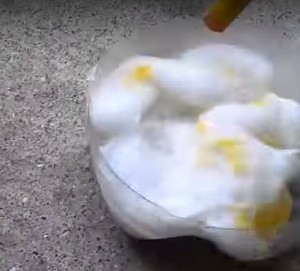
Step Six: Put On Your Plastic Gloves
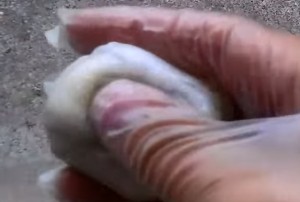 If
they’re not on yet, it is now time to don your plastic gloves. Make
sure you are using gloves that will not dissolve from acetone or
gasoline.
If
they’re not on yet, it is now time to don your plastic gloves. Make
sure you are using gloves that will not dissolve from acetone or
gasoline.
No comments:
Post a Comment